Most Z-Wave devices have parameters for setting the device. However, in SmartThings often only the most important or no parameters are displayed.
This guide shows you how to configure parameters using a special driver.
Note: This driver is provided by Mariano from the community. To support him click the link: Donut
Installation of the configuration driver.
- Login SmartThings Advanced Web App
- Open the following link:
- https://api.smartthings.com/invitation-web/accept?id=6b68563b-1905-4654-8d2b-e677a2997424
- Choose your Hub and tap on Enroll
- Tap Available Drivers
- Choose Z-Wave Device Config Mc and tap Install
Changing a device driver
Note: Your installed device must already be using an Edge driver for the driver to be changed.
 | - Open SmartThings App
- Change to devices
- Select your device to be configured and open it by tapping on it
- Tap 3 points Menu
- Tap on drivers
- Make a note of the driver you are currently using.
- Tap Select other driver
- Choose Z-Wave Device Config Mc
- Tap Use this driver.
- Confirm with OK
- Exit the menu.
- Go back toDashboard
- Tap on your device again.
- You will now see the Device Info
- After successfully setting the device, you must switch back to the previous driver to use the device as usual. To do this, perform these steps again up to point 7 and then select your device driver, which you have noted down.
|
Setting options:
 | - Open the 3 points menu (top right)
- Tap on Select Z-Wave Device Action
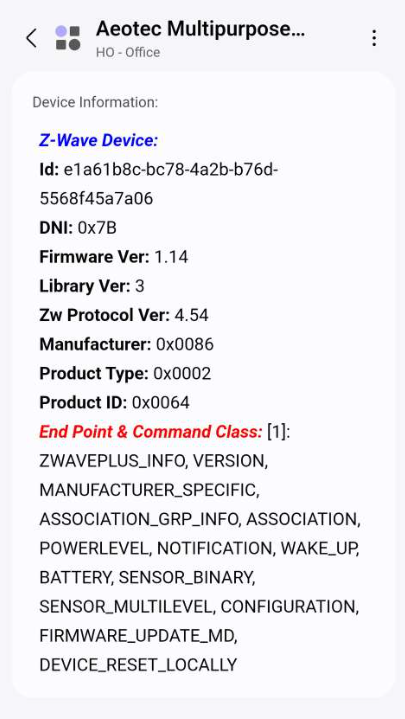
- Device Fingerprints Info... Shows you the ID and command classes of your device.
- Device Parameter Scan... Queries the current parameters and its configuration.
- Device Parameter Configure... Configure the parameters of the device
- Device Association Group Scan... Queries the current association groups.
- Device Association Group Conig... Configure the association groups.
|
Configuration:
Note: To configure devices, note that battery-powered devices must be woken up by a wake-up to apply the setting.
Note: After each change you have to go back to the dashboard and call the device again.
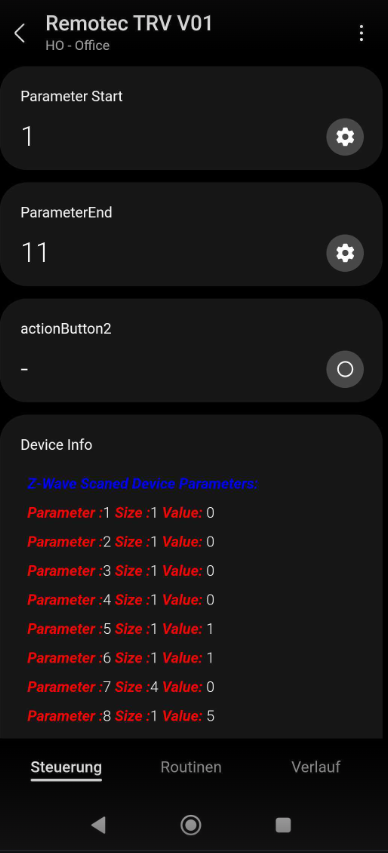 | - Enter the range of the parameters you want to query in ParameterStart and ParameterEnd.
- Tap on actionButton2
- The parameters and settings are then displayed under Device Info.
|
- Device Parameter Configure:
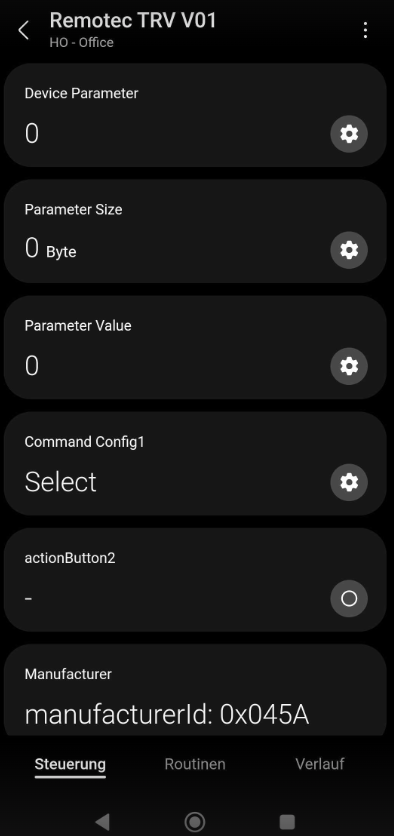 | - Enter the parameter number to be configured.
- Enter the sizeof the parameter
Tip: This can be queried under Command Config by Get. - Enter the desired value.
- Under Command Config1, select Send.
- To send the setting, press the actionButton2.
- Get... Fetches, the setting of the device.
- Send... Sends the setting to the device.
|
- Device Association Group Scan:
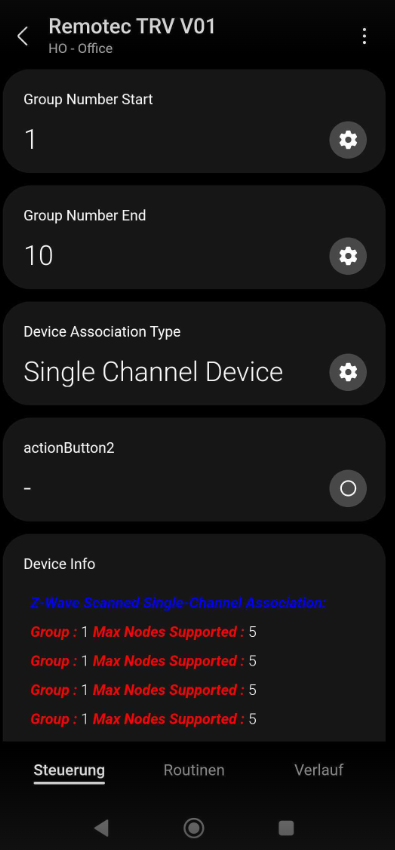  | - Enter the GroupnumberStart and GroupNumberEnd.
- Select whether the device is a Single Channel Device or Multi Channel Device.
- Press actionButton2 to retrieve the information.
- The current settings are then displayed under Device Info.
|
- Device Association Group Conig:
 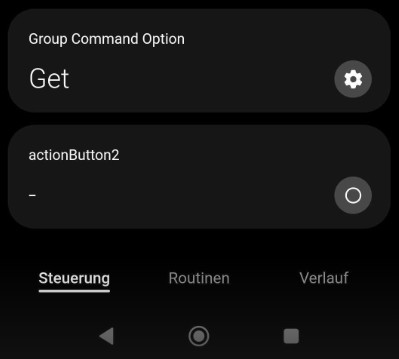 | - Enter the number of the association group to be configured.
- Enter the node of the device to be configured into the selected association group.
- Select whether it is a single channel device or a multichannel device.
Tip: By using Get under Group Command option, one can retrieve the current setting. - Select Set under Group Command option and set the setting.
- Press actionButton2 to execute the action.
- Set... Sets the set configuration
- Get... Fetches the setting from the device
- Remove All Nodes... Removes all set devices in the association groups.
- Remove One Node... Removes the selected node from the association group.
|